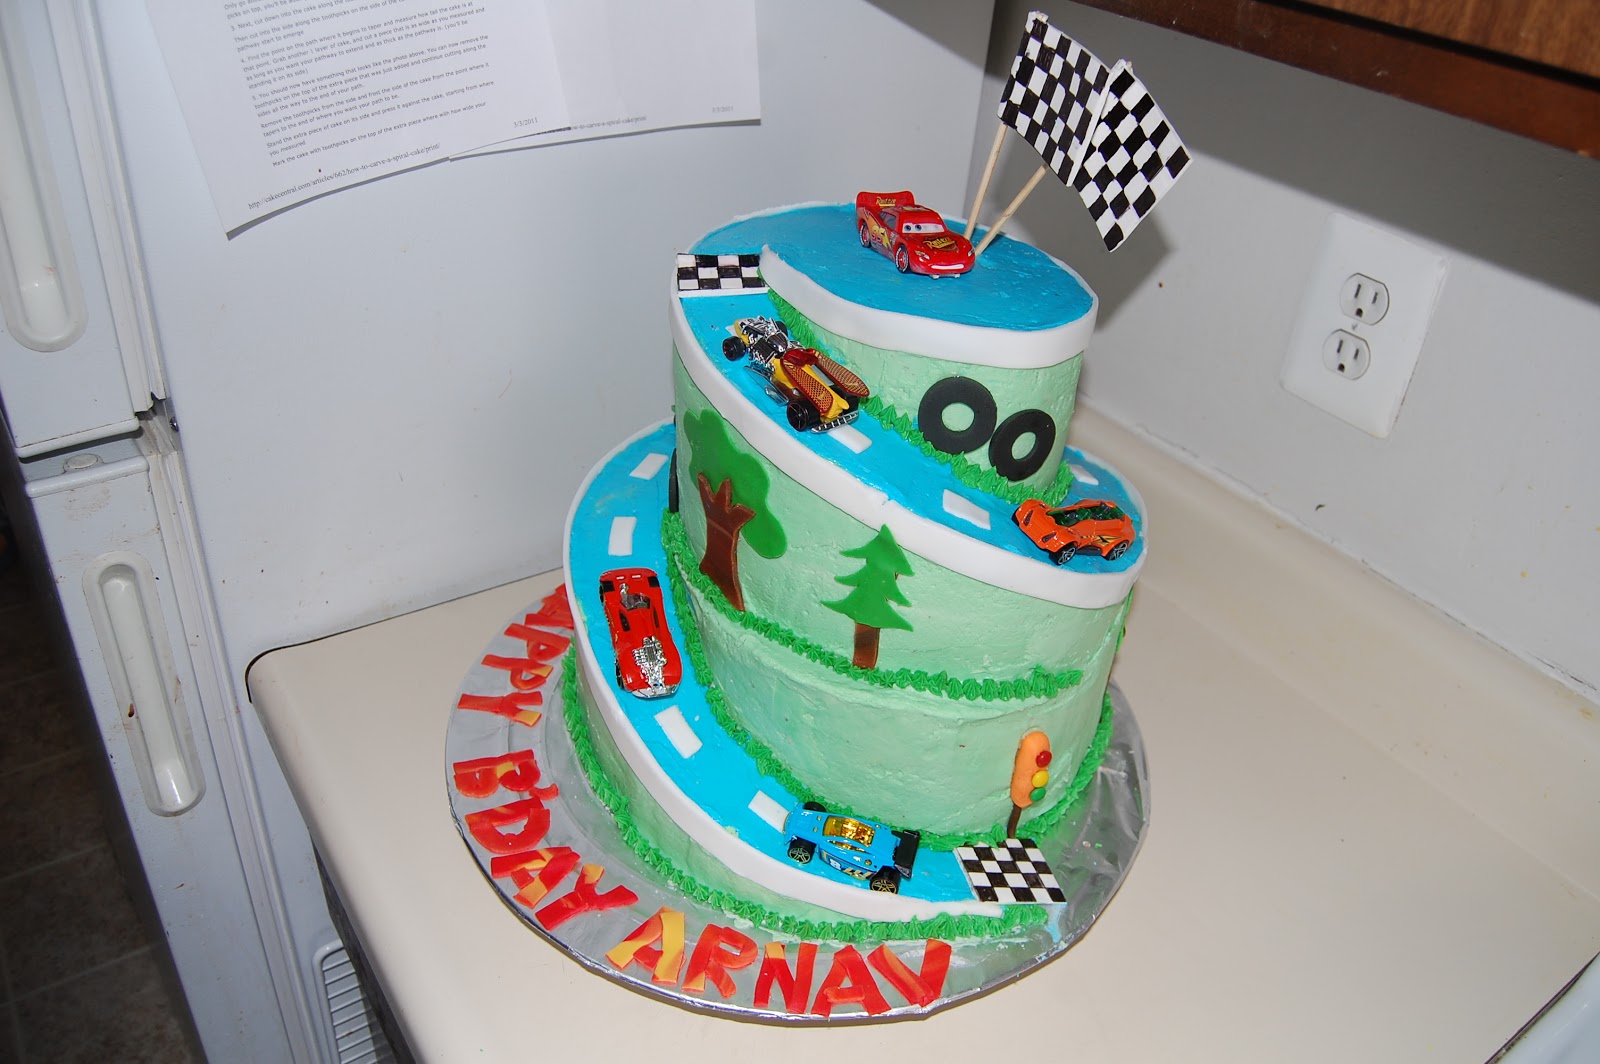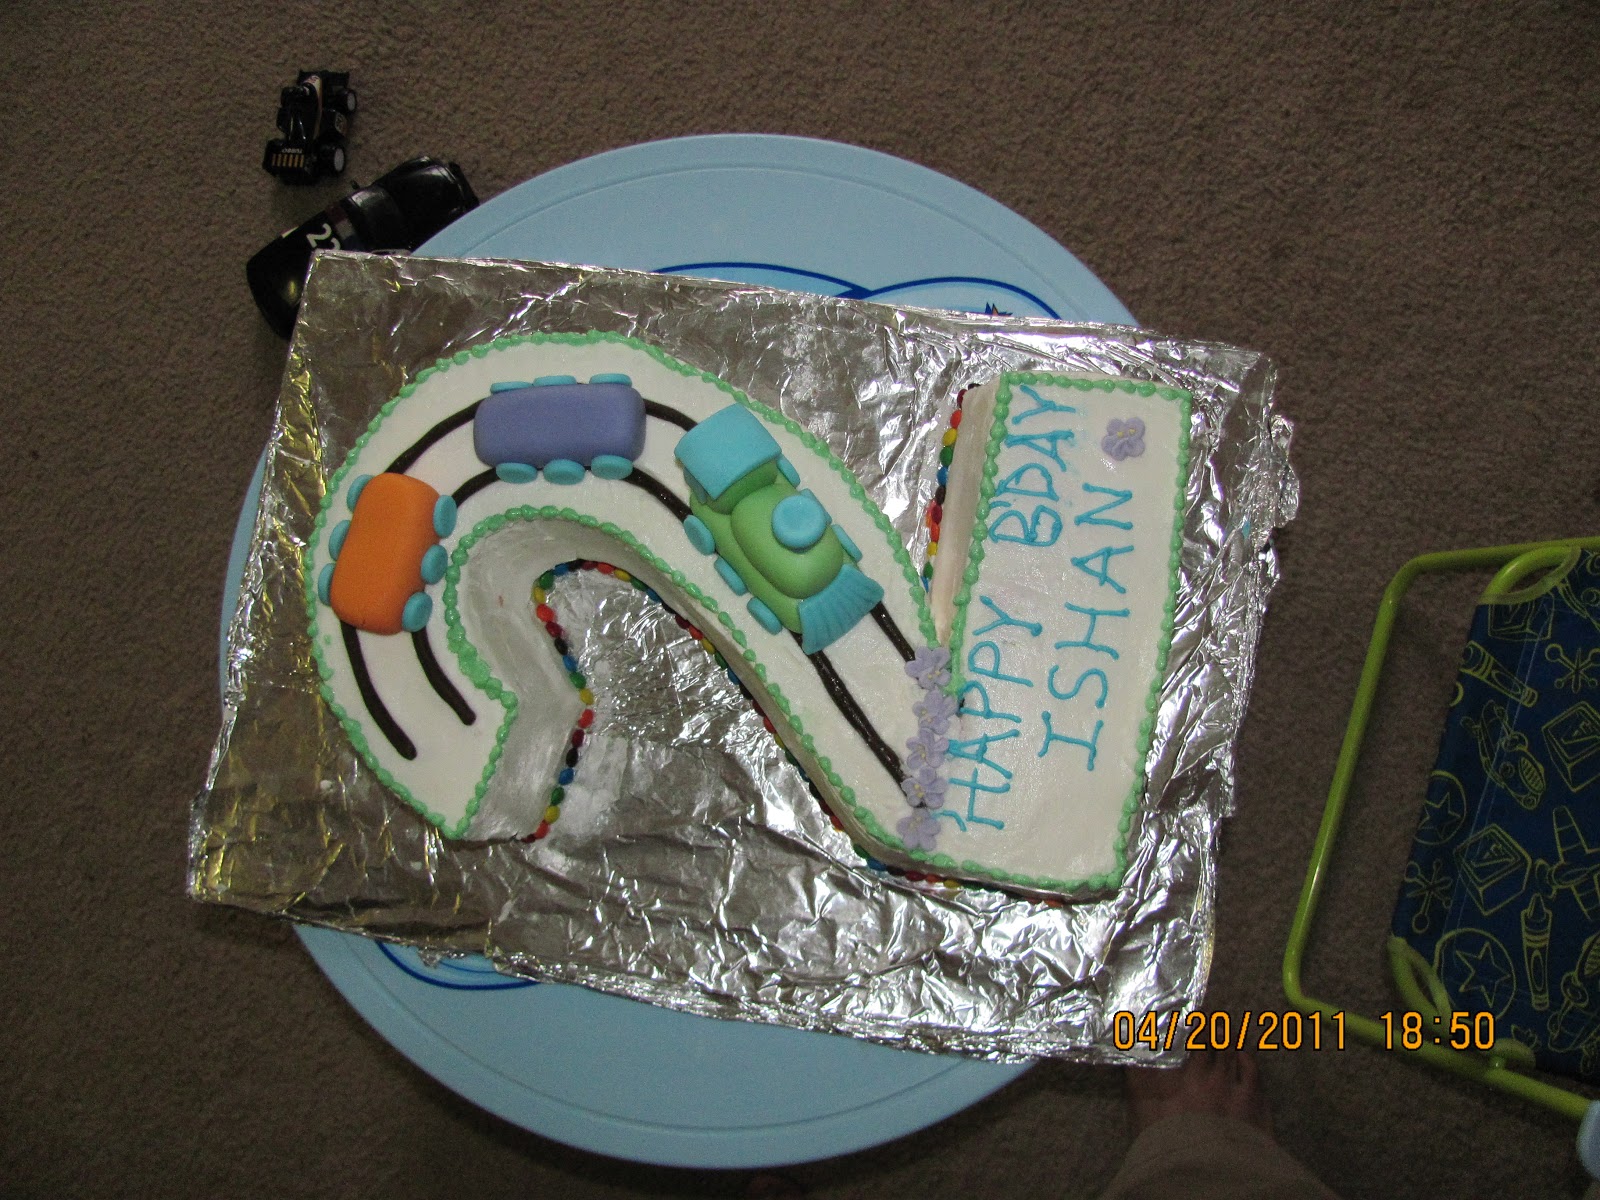
I made this cake for my friends son's second birthday. I wanted to share how I made the number 2 rainbow cake. So here it goes...
I love baking from scratch; it brings me a lot of joy and it simply tastes better to me. But if you're not as into baking, you can always use boxed cake mix. Start by choosing your favorite white or yellow cake recipe/mix. I used a classic white cake with white chocolate butter cream filling and butter cream frosting. Since i was not having number 2 pan i made three 9"X13" cake sheets and carved number 2 from that. Before going into carving just we will see how to make a rainbow cake.
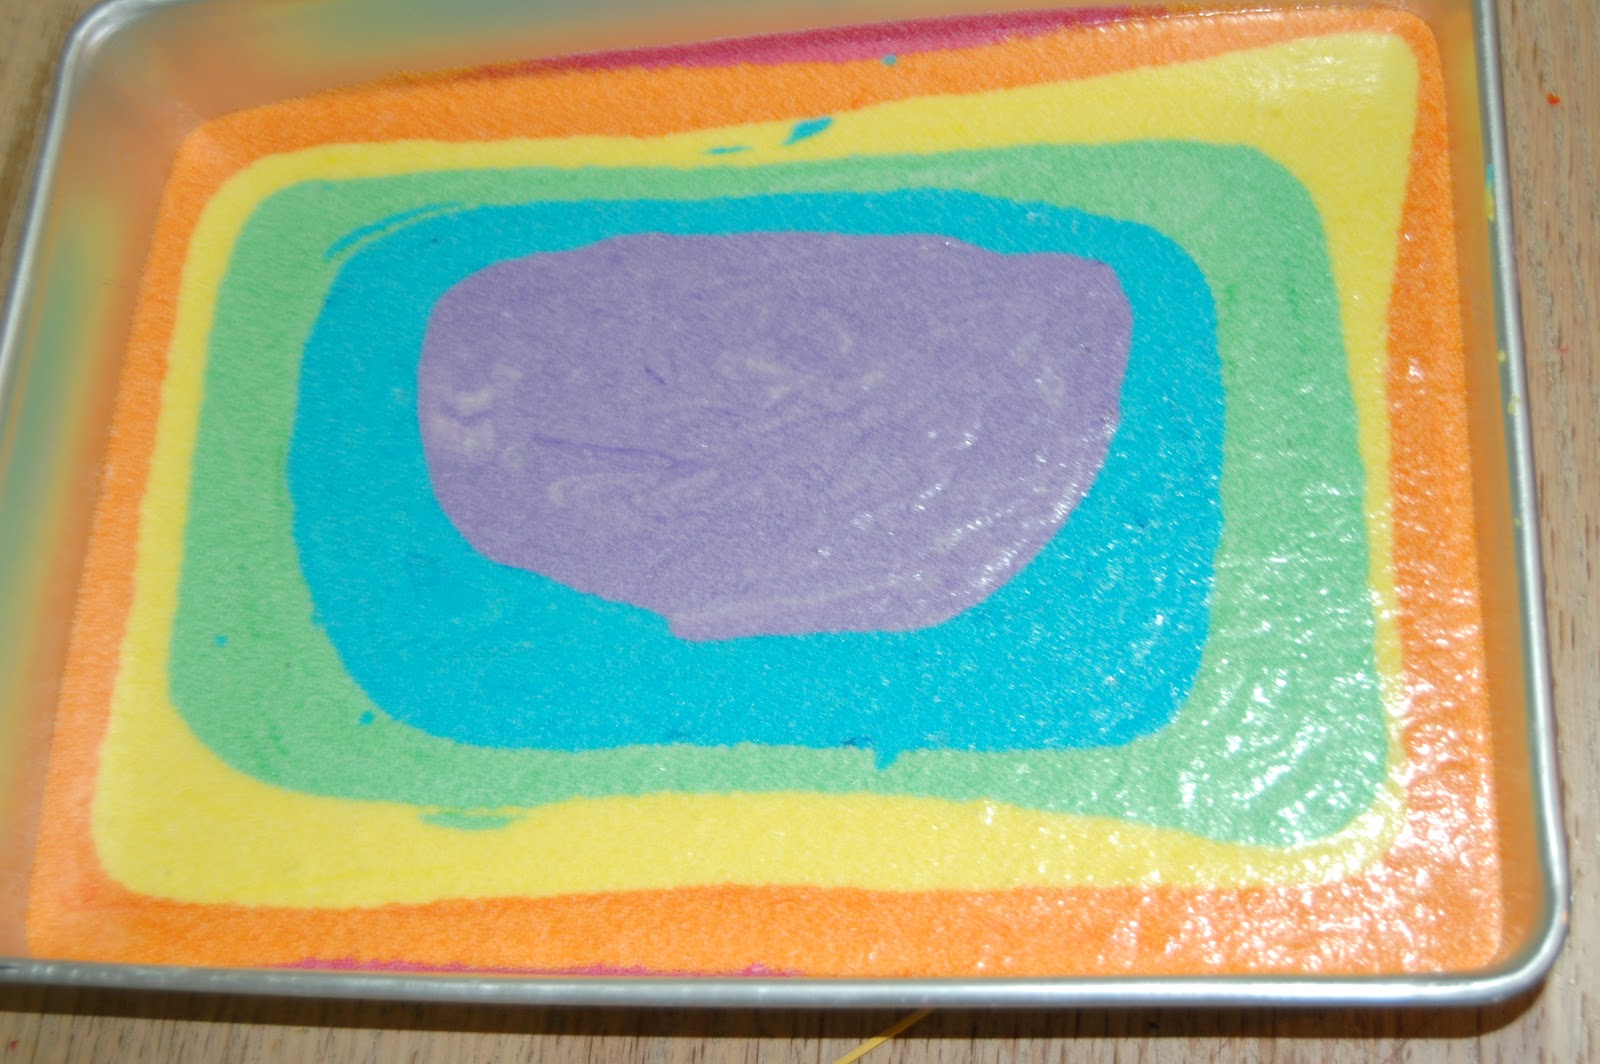
Whatever cake you decide on (white or yellow will take the colors fine!), once the batter is made, divide it equally into six bowls. since i was using 9"X13" pan i made a 6 cups batter so that i will have a cup of batter for each color. Then mix in the rainbow colors -- red, orange, yellow, green, blue, purple. Gel food coloring works great since it gives more vibrant color than liquid food colors. But surely if u wont have gel food colors liquid will work as fine.


We decided to start with red as the bottom color in a pan.
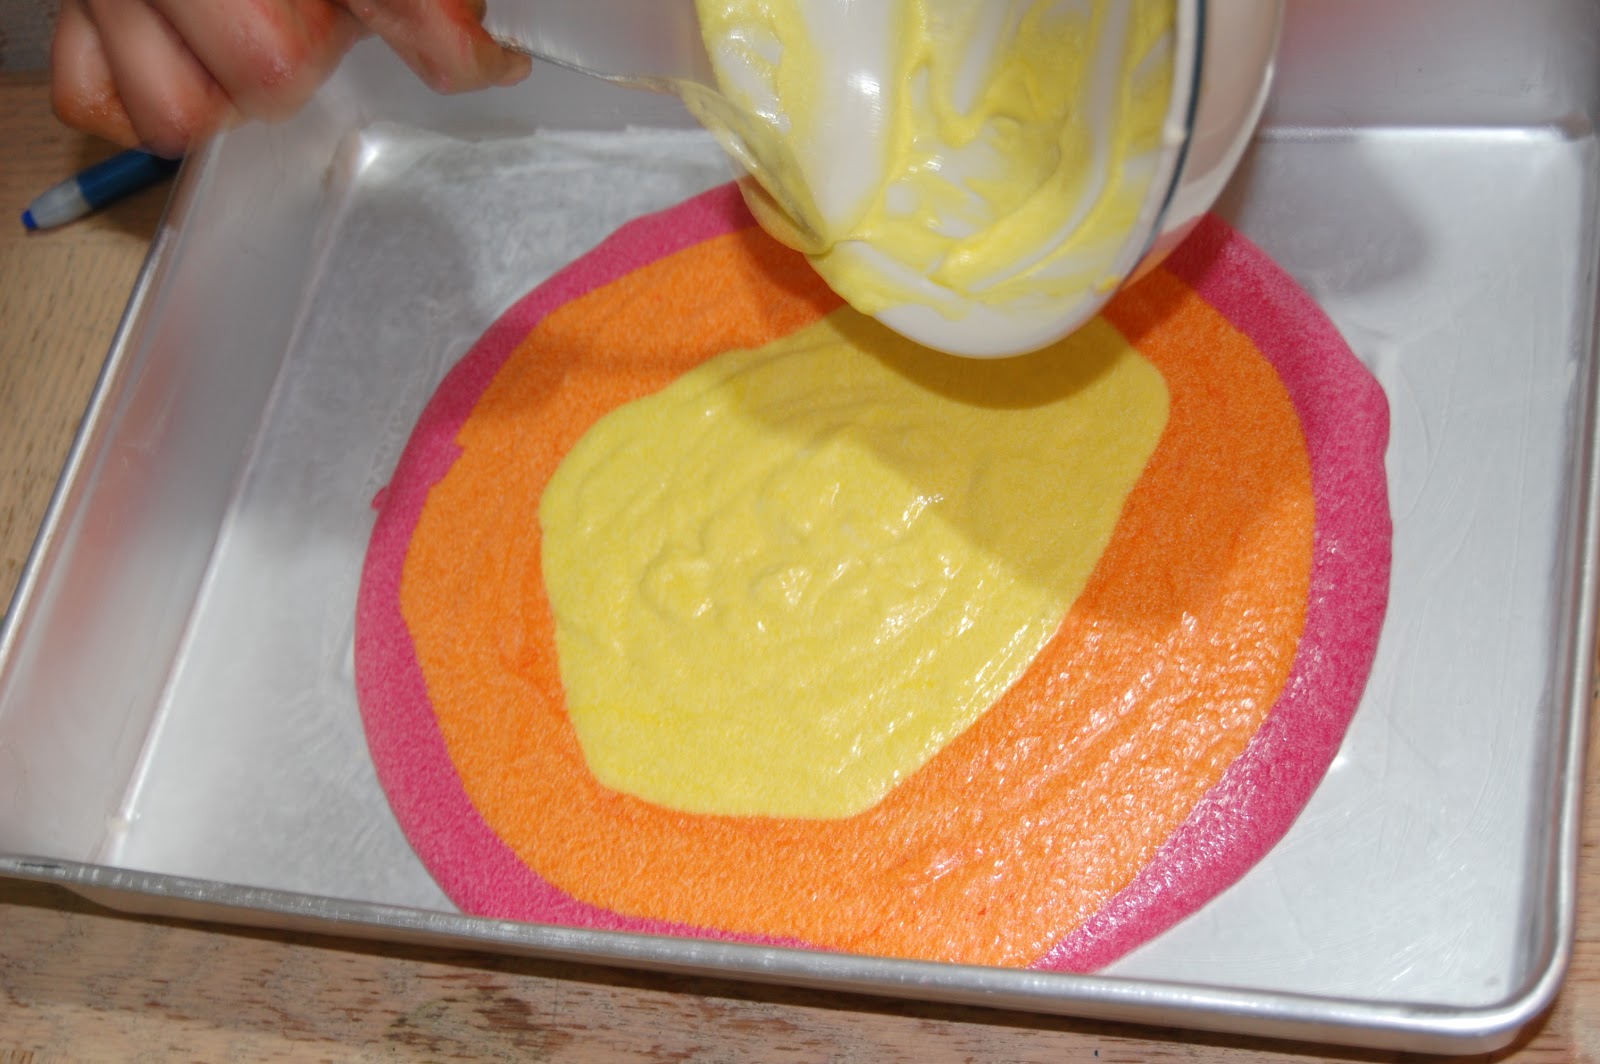
As you proceed with each color, just drop in the middle of the pan over colors.

At the end I rotated a pan between my palms quickly to spread the batter. If you are making in a two 9" or 8" pan just divide batter as three colors per pan starting red as a bottom color in a pan and purple as a bottom color in other pan. So when u fill and stack the cake u will get rainbow color sequence.
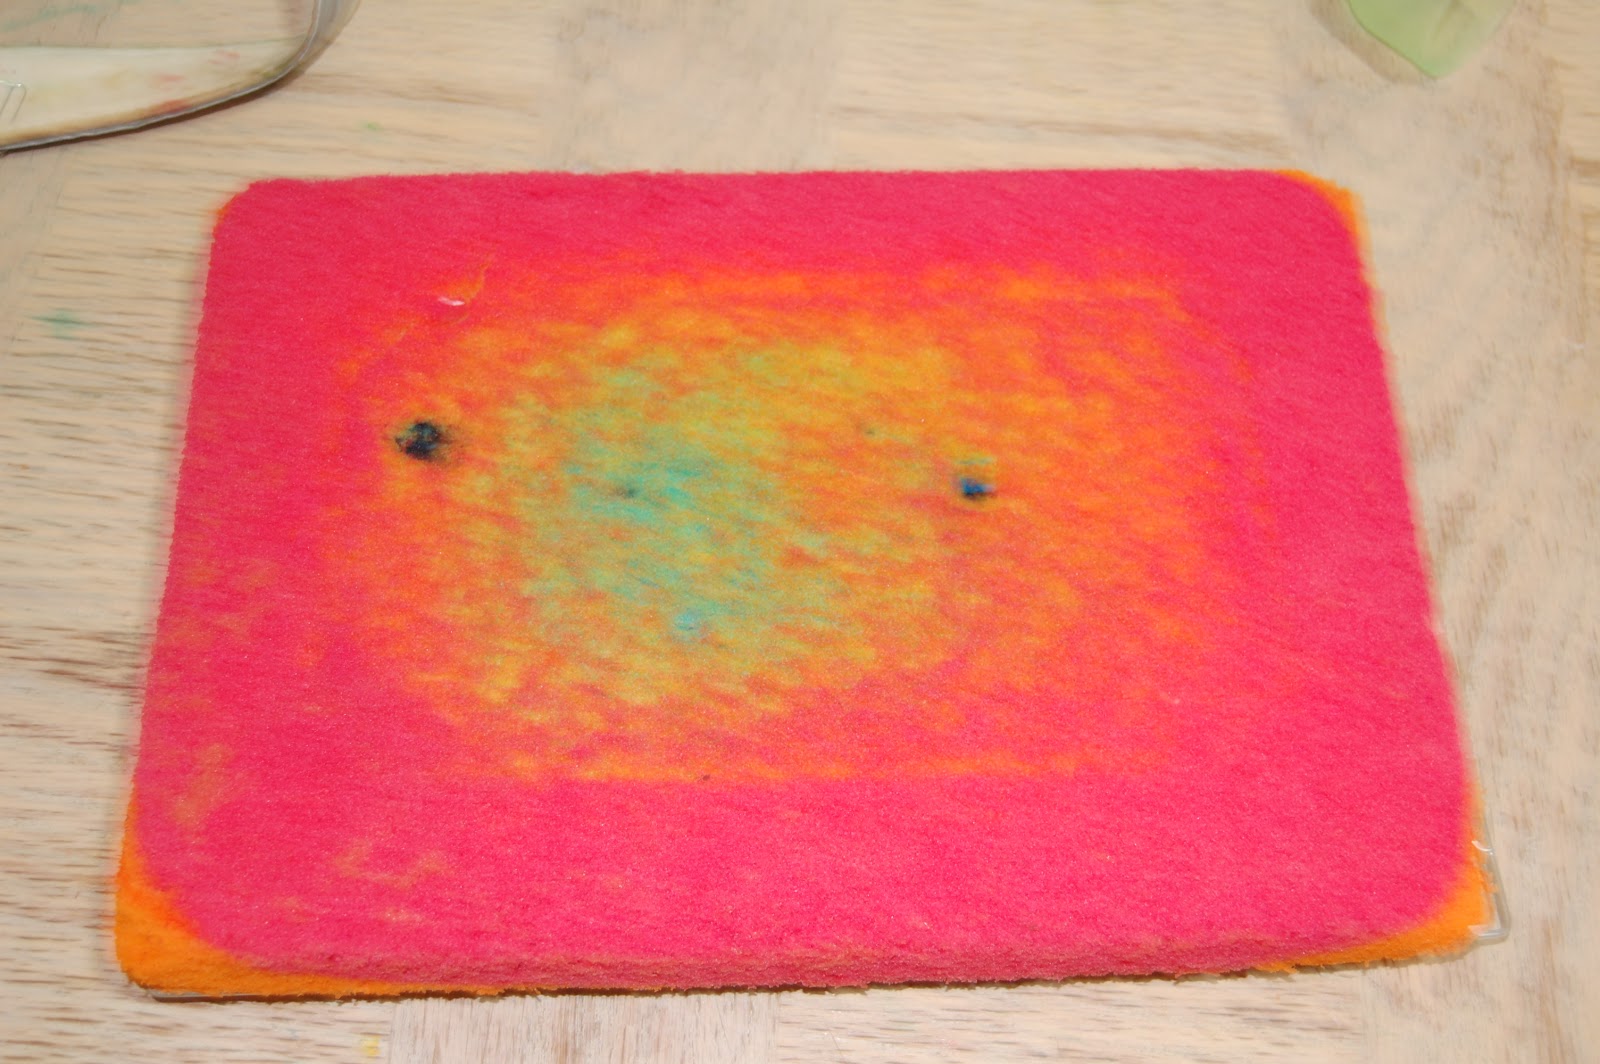
And that's it! Once the batter is dropped, simply follow your recipe's instructions for baking and cooling. Look how pretty this came out!
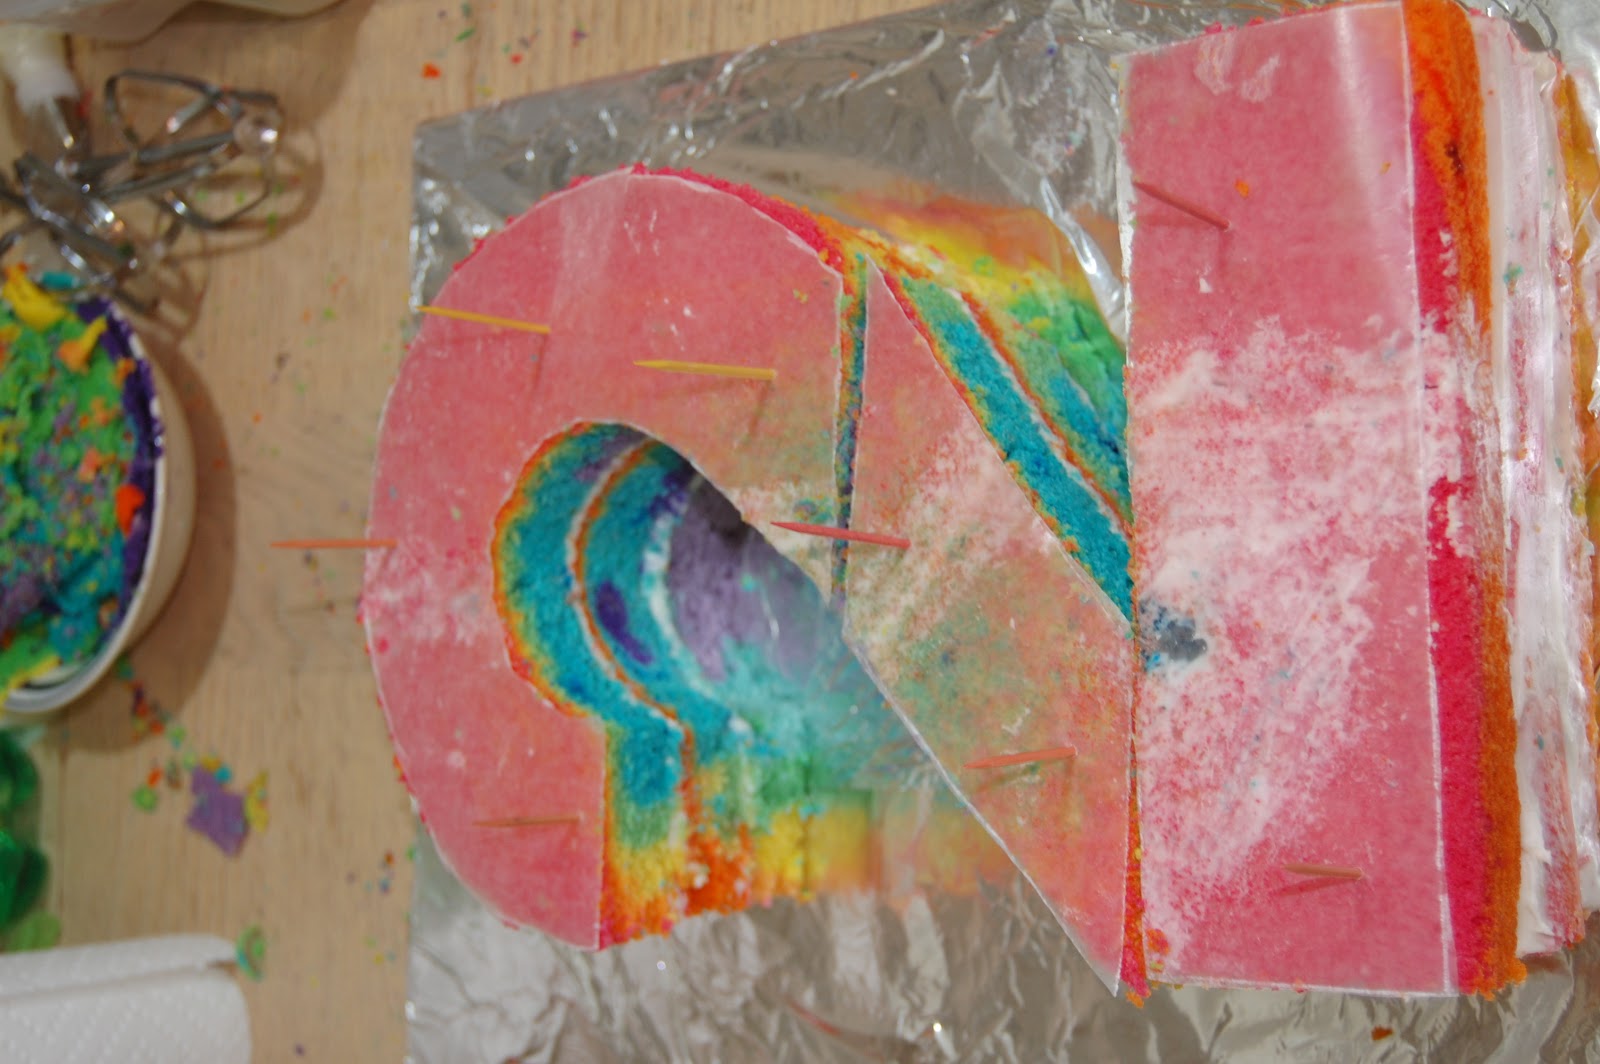
To give a height to the cake i made three layers of a cake. I filled white chocolate butter cream in each layer.I kept the cake in a fridge for an hour so that it will firm up a little and easy for carving as well.
I downloaded a A4 size number 2 template. Now transfer it onto a wax paper and arranged it on a cake.
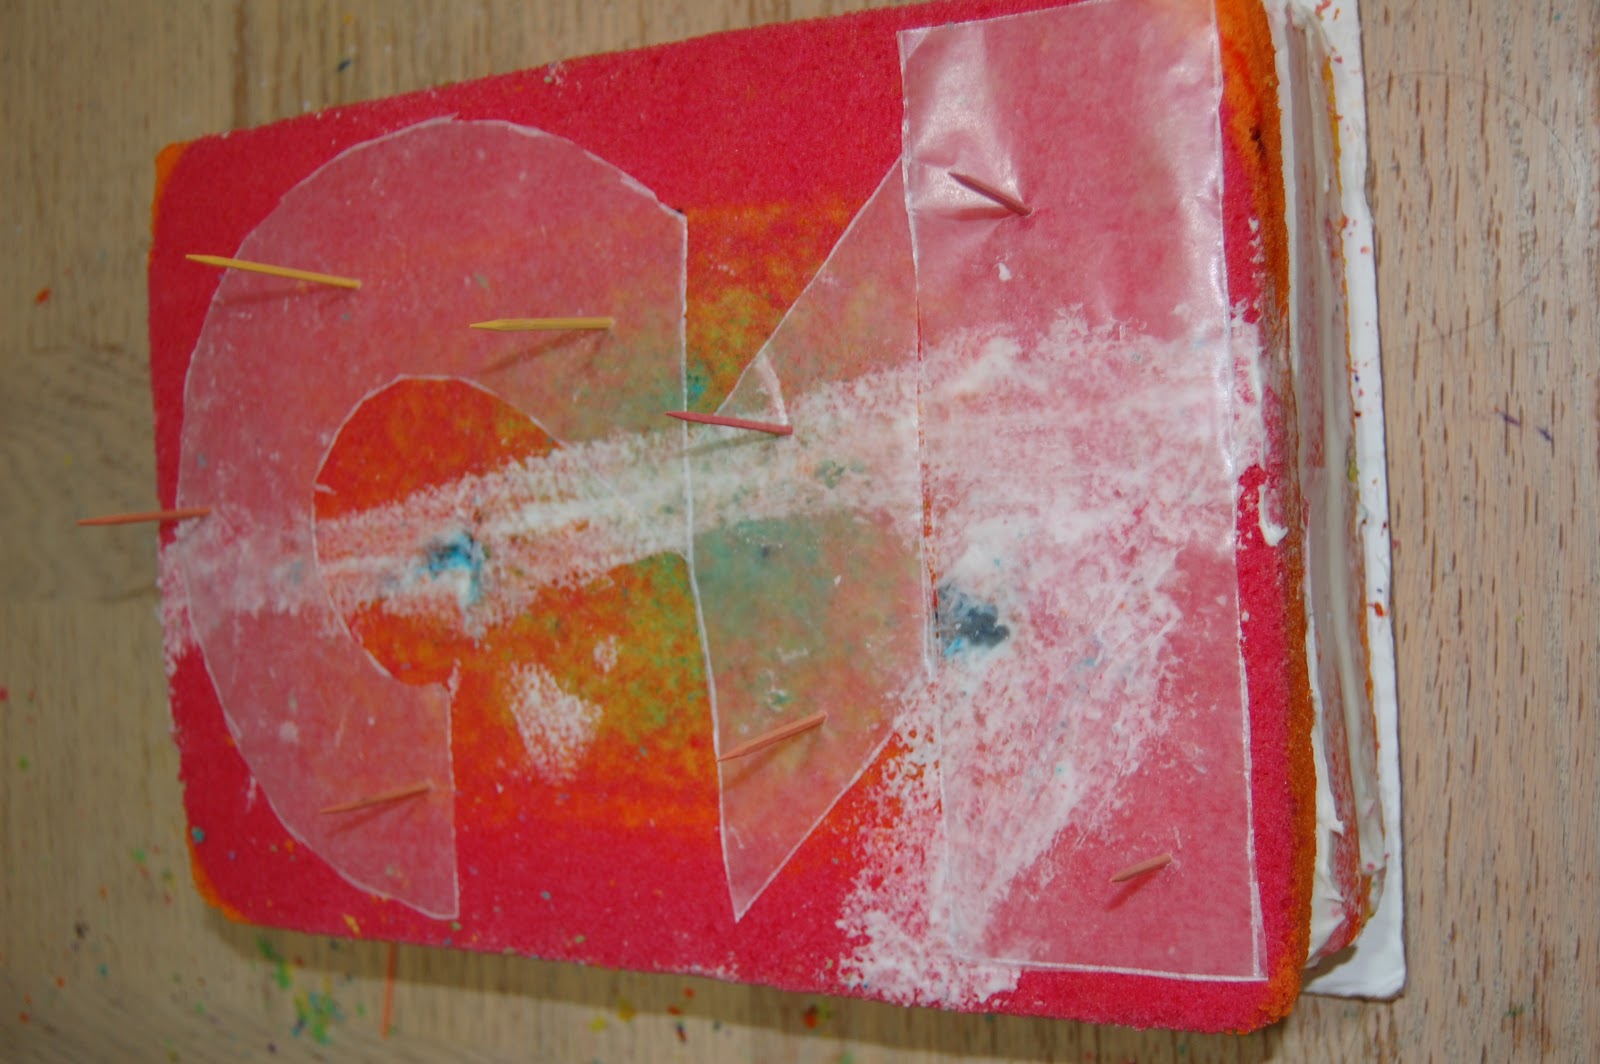

Crumb coat the cake and keep in a fridge for a hour or so. Now just frost your cake with your choice of frosting and decorate.
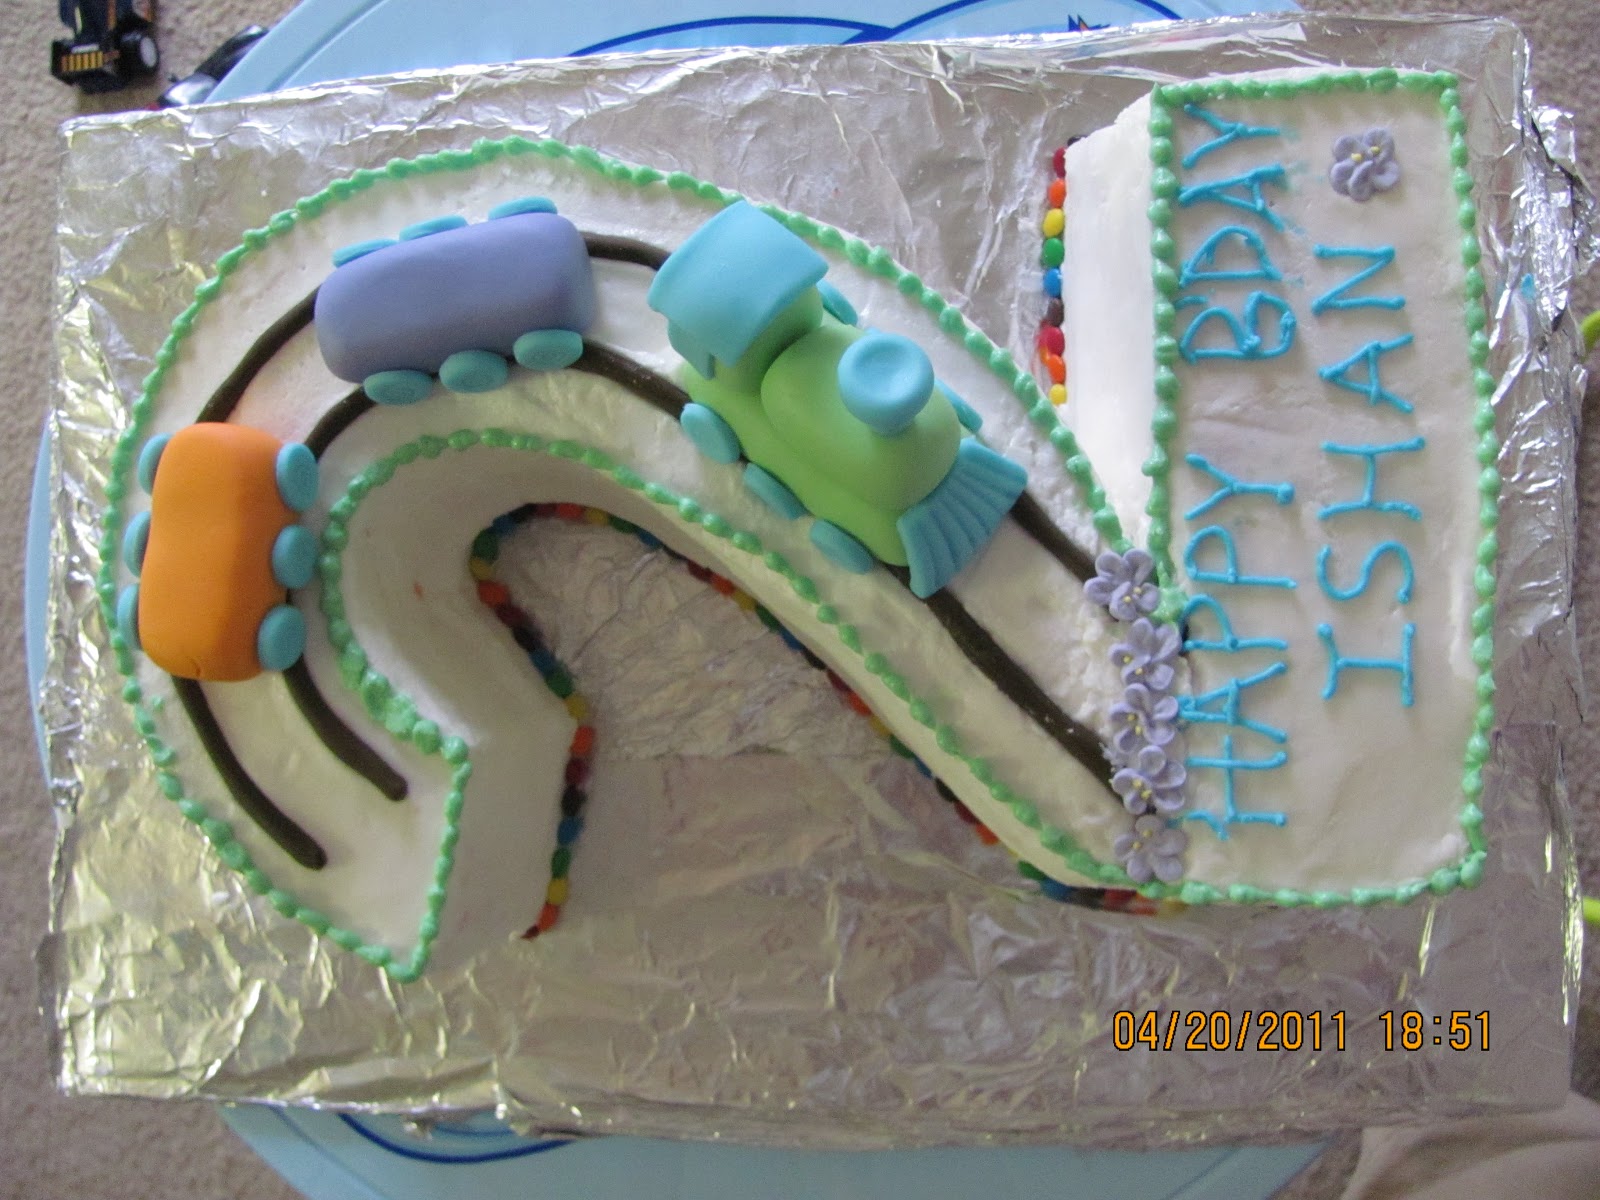
I made a train track and fondant train to go onto the cake. For the bottom cake border i used M&M and arranged them in a particular color pattern.
When we cut into each of these cakes I freaked out a little. It looked so cool! You can make a rainbow cupcake with this batter too. Just use a spoonful of each color per cupcake.Enjoy...!!